Sunday, September 7, 2008

Assignment 3, Final


Together for Greenery; Save our Forests

So i did this based on how people should come together in order to save what we need most, the forest as because we are lacking in unity that people do not care much. This is more of to encourage people to stop themselves from being selfish and move forward with each other to protect the forests from slowly disappearing.

The big motherly willow tree there is to symbolize how she brings all the little forests together to protect from the disastrous event called Deforestation. Despite the fact that most of the forest family members are long gone, they still stand strong together trying to face life without wilting away or being chopped off.
The little forest friends are pretty much the future generation of trees coming together to show a sense of unity/family in working together to preserve their own kind. They might not be able to start a new revolution but yet they stand strong together.

We should stand together and protect what we need most. Protect what is important. Our need for oxygen and shelter from forests which protect us all from suffocation in this pretty much dysfunctional world!

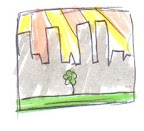
The colours here are once again, pretty basic, only to symbolize the colours of the forests. The sky however is not the normal blue sky as blue skies would only show the positivity of the whole image when people see it and go "oh, they're happy under the blue sky". Therefore i changed the colour of the sky into something dull to give the slightest impact to it.

Yes, i added the coconut tree for the sake of it having a sort of 'kampung/malaysian' feeling to it. I wonder if coconut trees are being deforested.

So there you have it.

Assignment 3, Step by step

Once again, a step by step on how i did my poster because it's always good to learn how to do it.

1. I placed the first sketch and started to trace all around it to get the form and shape using the pen tool.

2. Next, i proceed with tracing the sketch of the little forest friends carefully using the pen tool. Mostly used the pen tool but for the uneven leaf-like outline, i used the pencil tool as it was easier to make the lines look smooth and un-even.

3. Added both of the traced outlines together to form a base for the whole poster.

4. Coloured the big Willow tree using the Live Paint Tool which was quite frustrating near the end as i have forgotten to close all paths. So there was an awkward moment there while trying to colour. I didn't take a screenshot of the coloured little forest friends as the process is almost the same as this one.

5. Using the reference photo of the Willow leaf, i carefully traced the shape of it using the pen tool. Somehow the shape was fun to trace due to the fact that it's curvy and not cubic, i suppose.

6. I coloured the leaves using the Paint Bucket tool and started to arrange the leaves one by one seeing as how the symbol sprayer tool was not effective enough for me to use and i had time to waste. I duplicated, transformed, played around with the shape of the leaf and after doing a lot of duplicating, i finally stopped at that current point where the willow tree looks good enough.

7. Of course, i didn't forget about the background. I did the silhouette chopped off trees at the back using the pen tool and pretty much flat colours. As for the sky, i used the same technique as the one i did for my illustration. I used the brush to line up the clouds, making it look like a mist of clouds rather than puffy cotton-candy-like clouds.

8. Added the little forest friends into the whole thing just to test out how it looks and i'm pretty much happy with it.

9. Added the motherly Willow tree face on it because it just won't do without a face. Honestly, i'll confess that i used my mom's face for this because i couldn't come up with a motherly face to draw therefore i took her photo and traced it using the pen tool and altered it in some way so that it won't look like her face at the same time. And no, i'm not showing the steps on how i traced my mom's face here haha.

10. Added the final touch up, the logo, and my caption for the whole poster: Together for Greenery; Save our Forests. Behold, the final product!

Thursday, September 4, 2008

Assignment 3, Preliminary sketches

Some sketches of the elements/preliminary studies i'll be using for my overall poster x)


Will be using the whole idea of a Willow tree there
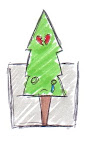
Little tree friends. There's a baby tree bush there too.

Reference for the willow tree leaf taken from HERE

Yes i'm going for the cuteness look >8D

Monday, September 1, 2008

Assignment 3, Research

So i did some research on the type of posters i can use for reference or better yet, for inspiration. Something concerning the trees and how we should show more love for it/the whole saving the forests, i suppose.

Taken from HERE

Taken from HERE


And my most favourite:

Taken from HERE

Not much but it'll do for now :D

Saturday, August 16, 2008

Assignment 2, Final


Title: Healthy Tree
Area of global warming: Deforestation

Are we supposed to do some sort of description for the whole illustration? :/ ah well, here goes my shot.

I did the illustration based on how i want a tree to actually be. Instead of chopped off, beheaded, crying, suffering, i'd rather draw a happy healthy tree any day since it has more meaning to it and most people can enjoy appreciating and looking at it.

I picked soft colours because i was aiming for it to have an elegant but cute look to it which i hope is working so far. The colours are pretty basic (once again), there's no hidden meaning to it because i want it to be presented in a good and understandable way.

As for that, to sum it all up, it's a healthy happy tree, standing proud.
Save our trees now, please? 8D

Assignment 2, process

We shall now observe and start on the whole process for the illustration, yes?

1. I did the outline for the tree, the base of it. Of course, i had traced it via one of the sketch in my previous entry but i didn't think it was much of an importance to add it in. The outline was done via the pen tool.

2. I added more tree carvings using the pen tool and proceeded to add the colours to it via the live paint bucket tool.

3. Fun part, the leaves. I took my time to do some research and finally settled with the selected picture which i soon started to trace using the pen tool. This is to help me get a good even shape of the leaf and to stop my brain from telling me to do the typical tear drop shaped leaf.

4. After tracing, i copied the outline of the leaf and added in 3 different colours to it. I duplicated the leaf and started to arrange it one by one on the tree since using the symbol sprayer tool made it look too busy and not exactly how i wanted it to look.

5. But this, however, was used via the symbol sprayer tool (the leaves at the back, lighter colour) since the arrangement was so that it would make the tree look much more healthier.

6. After that, i decided to make a simple background for my really lonely healthy tree. Experimented around with the colours, made the front part lighter, going darker towards the back. Oh, i used the pen tool here and then the live paint bucket tool.

7.Used the crystallize tool to make the whole place look like as if it's grass since it looks too illogically smooth. I suppose it did the job in a way.

8. Added the background, blue sky coloured via the live paint bucket tool. Then added the clouds using the paintbrush tool, testing around with the form and the length of the line. After much arranging, i played around with the opacity level and made the clouds look from white to less visible from bottom to top.

9. Added the logo 8D

10. Checked for any mistakes, touched up on some smaller parts of the whole piece and finally, finished~

Friday, August 8, 2008

Assignment 2, sketches

some tree sketches just for the sake of sketching.
Most prolly will use one of them as a base and make them pretty later.


aghhhh treeeeees

Thursday, August 7, 2008

Assignment 2, research

More research on trees for assignment 2.
This is done for the sake of helping me figure out the types of trees, the shape, the whole base of a tree, and other aspects of a tree.

More of like, a graphic study on trees, prolly?


And just for fun, this one looked interesting 8D


Photos from: FreeFoto
http://www.wbay.org/images/pigman-leaves.jpg

Thursday, July 17, 2008

Tres bien, completion!

Since it's completed, i shall now explain the parts and the tiny parts deep within the whole thing.


The rays of light+the sun;
Red+Yellow;
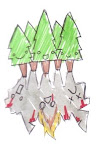
This is to symbolize the ray of light emitted by the sun as global warming includes the sun burning us all with no mercy thus the whole thing is caused by deforestation itself. It's kind of like showing an effect here due to deforestation. Let me rephrase that, the rays of light shows the effect of deforestation. Yes.

The destroyed trees at the back;
This is to portray the forests that are being cut down mercilessly by people for the sake of our urbanization. I know i should have made all of the trees being chopped off entirely but seriously, if i did that, you can barely see the trees sticking out. So in the end, i settled with those kind of trees, almost chopped off, but at the same time, suffering from the impact.

The two deforested logs;
I added this to give more impact. As to symbolizes the trees that HAVE BEEN cut down, currently dying slowly on the face of the earth. These pretty little things are being cut down for selfish purposes and yet people can't exactly identify the uses for these trees for they are beautiful(shown by the curvy tree markings) and also they help us tremendously.

The three sad trees;
This can be said as the eye-catcher since they're the only thing with faces. The main ones. The suffering ones showing emotion. This is to tell us that even though they're trees, they're unhappy and questioning us why they're being cut off.

The three tree shadows;
This, finally, is to symbolize how happy they should be. The trees can only be seen happy in their shadows because in their shadows, they can never be hurt by the living in reality thus allowing them to live as happy trees in the form of shadows, untouched, not destroyed. It's like a restriction from reality, really

The colours are pretty much symbolizes the trees, it's pretty basic. Green for the leaves, brown for the logs/barks/tree-body. Except for the rays of sun.


Did i explain that well?

Monday, July 14, 2008

Progress shot,

Shall we start with some progress shots of my symbol-of-some-sort, yes?


First step/layer;
I did the background for the whole symbol via using the pen tool.
After that, i added the colours via the paint bucket tool and made the lines transparent/no fill. That way, the lines wouldn't make it look too much of a burden for the whole thing.
I added the sun up there to give a little more impact.


Second step/layer;
I added the trees. Pen tool, paint bucket, TREES!
In this case, i only made two types of trees and proceeded to duplicate(copy+paste for those who don't know) and adjusted their sizes so that it won't look too repetitive.


Third step/layer;
Added the two deforested logs to give even more impact of trees being cut down.
This was done once again via the pen tool and paint bucket with some usage of the eraser tool(in which is sort of troublesome at times but i'm patient enough and still learning).


Fourth step/layer;
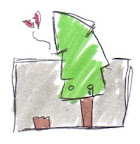
Proceeded to add the sad little tree with band aid on it's head.
I did the tree in another new file using the pen tool, ellipse tool(for the eyes), paint bucket tool and the eraser tool.
After that, i copy+pasted the whole thing into the original file and resized it.

Final step/layer;
Finally, added another two trees because one tree looked lonely enough to not give much impact.
More desperate emotional trees being cut down and happy shadows.
The same method used for the trees as i used in step four.
After some adjustments, it's done. In a way. Yes.


After this assignment, remind me to do some gardening.

Wednesday, July 9, 2008

Some sketches

Here are some sketches i did out of pure boredom just to spend time and at the same time finish my work. Deforestation, once again.
Symbol, much?


Dear-ness, save our trees!

Saturday, July 5, 2008

Global Warming and the chosen topic

Based on our main topic for our computer graphics symbol assignment, we were to choose a small topic from the big one and as of that, i have chosen:

Deforestation

Of course, some brief info on Global Warming together with Deforestation itself. Global Warming is defined as a gradual increase in the Earth's average temperature, specifically in the Earth's atmosphere and it's ocean. Due to this, it is believed that it will permanently change the Earth's climate forever.
There are many causes to Global Warming and as i have mentioned, i will be focusing on 'Deforestation'.

Deforestation is a conversion of forested areas to non-forest land. There are many reasons as to why deforestation is happening up until now which are related to money or to people's need to provide for their families. However, the most biggest factor of deforestation is to increase the urban landscape. Because of this, many of the world's forests are being permanently cut down resulting in causing the earth's temperature to creep upwards. This not only brings down the earth but also the entire mankind as the high temperature affects us greatly.


Reference: National Geographic - Deforestation
Live Science - Global Warming